
An advanced customisation option involves creating Member Types under Hub Settings. Here you can segment your community members into distinct categories to enhance your hub’s organisation and branding even further.
We recommend creating member types that work for your brand. For example, an educational establishment may benefit from creating Teacher, Parent and Student types, whereas businesses with membership tiers may wish to create Gold, Diamond and Platinum types purely based on price.
Further, you can collate members of different Member Types into Groups. For an educational establishment, adding members with types titled Teacher, Parent and Student into Groups titled Class 1, Class 2 and Class 3, is possible.
Enter: Ugenie's Member Types

-
Log on as Administrator
-
The default landing page is Dashboard
-
Find the Menu in the top right-hand corner next to your name
-
Click Hub Settings
-
Scroll downwards
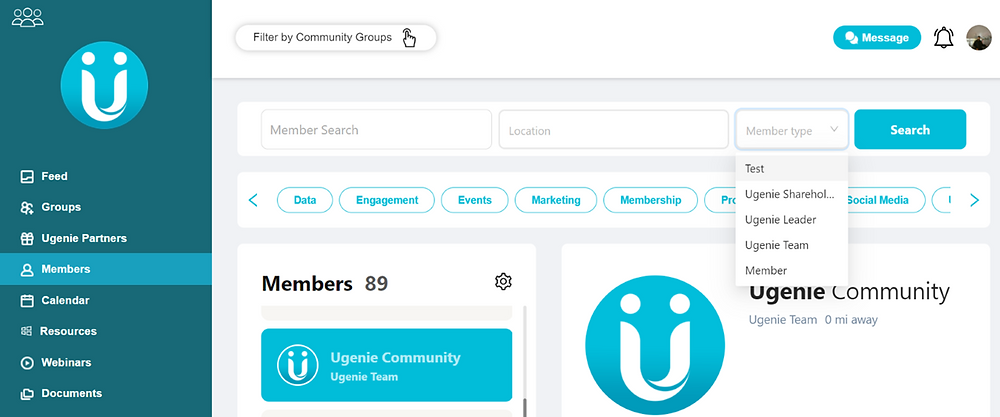
Click Member Types

Type the name of your chosen Member Type and press Enter

Click Create Member Type

‘Member Types Added’ will appear at the top of your screen as confirmation.

Your new Member Type has officially been created and is available to view.
And there you have it! That’s how to add a member type on uHubs!
If you are a community leader, on Ugenie or not, why not join the Ugenie Community, and explore our thriving network, diverse resources, and software?
Ugenie Members: https://members.ugenie.io/hubs/qh8PKTKMtPG6sgMXAgGR/sign-up If you are a community leader, or in the business of community, book a demo today.

Share this

How to Change Your Hub's Management Functions

How to Customise Your Hub’s Branding | Ugenie | uHubs: Leader Guide
